Newest Wall Painting Techniques and Designs:
Technique Tip 1: To avoid lap marks, roll the full height of the wall and keep a wet edge:
Lap marks are those ugly stripes caused by uneven layers of paint buildup during painting. They occur when you roll over paint which is already partly dry. (In warm, dry weather or condition, latex paint can begin to stiffen in less than 60 second!) The key point to avoiding lap marks is to maintain a “wet edge,” so each stroke of your roller overlaps the previous stroke before the paint can start to stiffen and dry.
In order to maintain a wet edge, start near a corner and run the roller up and down the full height of the wall, moving over slightly with each stroke. Move backward where necessary to even out thick spots or runs. Please avoid the roller becoming nearly dry; reload it often so that it’s always at least half loaded. Keep the open side of the roller frame facing the area which is already painted. That puts less pressure on the open side of the roller, so you’re less likely to leave paint ridges
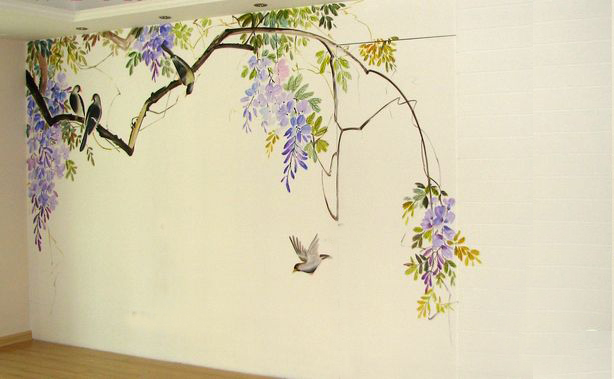
Wall Painting Design for reference:
Technique Tip 2: Mix several cans of paint in a large bucket for a consistent color throughout the room
The color of paint may vary a little from one can to the another. If you have to open a new can in the middle of a wall, the difference may be noticeable. Mixing the paints together can eliminate the problem. You should estimate the amount of paint you need and mix it in a bucket (a process called “boxing”).
When coverage is difficult to estimate, add more rather than less. You can always pour the leftover back into cans. For large jobs, use the bucket and a roller screen rather than a roller tray. It’s much faster to load your roller with the screen than to use a roller pan. Simply dunk the roller into the paint bucket, then roll it along the screen until it stops dripping. ----Newest Wall Painting Techniques and Designs.
Technique Tip 3: Let the paint dry, then cut the tape loose for a perfect edge
Once paint is dry, you can’t just pull the tape off the trim. Paint forms a film between the wall and the tape, and removing the tape tears pieces of dried paint off the wall. So before pulling off the tape, please remember to cut it loose.
Wait for the paint to become completely dry, at least 24 hours, then use a sharp utility knife or box cutter knife to slice through the film. Start in an inconspicuous area to make sure the paint is hard enough to slice cleanly. If you cut the paint while it’s still gummy, you’ll make a mess. As you cut the paint, pull up the tape at a 45-degree angle.
(Newest Wall Painting Design)
Technique Tip 4: Paint the trim first, then the ceiling and walls
Prime and texture wall
Pros usually follow a certain order when painting a room. They paint the trim first, then the ceiling, then the walls. That’s because it’s easier and faster as well to tape off the trim than to tape off the walls. And you certainly don’t want to tape them both off!
When painting the trim, you don’t have to be neat. Just concentrate on getting a smooth finish on the wood. Don’t worry if the trim paint gets onto the walls. You’ll cover it later when painting the walls. Once the trim is completely painted and dry (at least one full day: 24 hours), tape it off (using an “easy release” painter’s tape), then paint the ceiling, and then the walls.
Technique Tip 5: Prime and texture wall patches to avoid a blotchy finish
Freshly painted walls often look blotchy. The color is uniform, but the sheen isn’t consistent. This usually occurs over the holes and cracks you patched with a filler or drywall compound. The porous fillers absorb the paint, dulling the surface (a problem called “flashing”). When light hits these dull spots, they stick out like a sore thumb. The smooth patch also stands out in contrast to the slightly bumpy texture of the rest of the wall. A quick coat of primer is all it takes to eliminate flashing and texture differences.
Primer seals the patch so paint won’t sink in and look dull. To match texture, prime with a roller, feathering out the edges. Choose a nap thickness to match the surrounding wall texture (a 3/8-in. nap roller for smooth walls; 1/2-in. for textured).
Technique Tip 6: Clean dirty surfaces so as to make the paint can form a strong bond
If you paint over dirty, oily surfaces, the paint will easily chip or peel off. So before painting, it's necessary and important to clean grimy areas with a deglosser or heavy-duty cleaner intended for prepaint cleaning. They work well to clean painted, varnished or enameled surfaces to improve the adhesion of the new paint on the wall. They’re ideal for cleaning greasy or oily areas like kitchen and bathroom walls and removing hand marks around light switches and doorknobs.
Wipe on the cleaner in a circular motion using a lint-free cloth or abrasive pad. Start at the bottom and work up. After the surface is clean, fill in any nicks and holes, then sand them smooth carefully before painting. The cleaners are usually available at paint stores and home centers. (Attention: Be sure to wear rubber gloves and eye protection.
Technique Tip 7: Roll paint along the edges to ensure the effect of consistent texture
Corners and areas next to trim that are painted only with a brush have a notice- ably different texture than the surrounding paint. To ensure the finished texture will be consistent in these areas, brush on the paint, then immediately roll it out before the paint dries.
Use a 3-in. roller with a nap that’s the same thickness as the roller used for the rest of the wall. Roll as close as you can without bumping the opposite wall or slopping paint onto the trim. Finish brushing on the paint and rolling it out in one area before moving on to the next section.
Technique Tip 8: Feather out paint where you can't keep a wet edge
You can’t cover large areas like ceilings, extra-tall walls or stairwells in single, continuous strokes, so the best way to minimize lap marks on these areas is to feather out the paint along the edges that you can’t keep wet. The thinner, feathered coat of paint will avoid the buildup that causes the lap mark.
To paint a large section without leaving lap marks, roll the nearly dry roller in different directions along the dry edge, feathering out the paint as you go. After completing the entire length of the wall or ceiling, move to the next section and paint over the feathered edges. For the second coat, apply the paint in the opposite direction. This crisscrossing paint application sharply reduces (if not eliminates) lap marks.
Technique Tip 9: Sand trim between coats for an ultra-smooth finish
One coat of paint usually won’t hide the underlying color and sheen on trim. And, if you don’t sand the surface smooth between coats, the finish may have a grainy texture. For a smooth finish, sand the trim before applying each coat of paint.
Sand the trim with a fine-grit sanding sponge. Sponges get into crevices where sandpaper can’t go and let you apply even pressure. Then apply the first coat of paint, let it dry for at least 24 hours, lightly sand it again for a completely smooth surface, and apply the second coat. After each sanding, vacuum the trim, then wipe it down with a tack cloth to remove the dust and make sure that it's clean enough for the next painting.
Technique Tip 10: Use cotton drop cloths rather than plastic
Spills and spatters happen, regardless of how careful you are. It’s a lot easier to pre- pare for them than to wipe them out of your carpeting or off your wood floor later. All it takes is canvas drop cloths in your work area (a 4-ft. x 15-ft. cloth costs USD15). The thick canvas stays in place, so you don’t need to tape it, and you can use it to cover any surface. Plastic drop cloths are slippery to walk on or set a ladder on and don’t stay in place. Even worse, paint spills on plastic stay wet, and they can end up on your shoes and get tracked through the house. Canvas is slippery on hard floors, so rosin paper (USD10 for 400 sq. ft.) is better over vinyl, tile and hard- wood. Tape the sheets together and to the floor to provide a nonslip surface.
But even with canvas or rosin-paper drop cloths, large spills still need to get wiped up right away or they would seep through. Clean spills with paper towels or cloth rags. Likewise, if you splatter paint on any other surface,wipe it up immediately.
Refer to: http://www.familyhandyman.com/painting/techniques/10-interior-house-painting-tips-painting-techniques-for-the-perfect-paint-job/view-all
Edited by Kevin from Xiamen Romandy Art Limited.
Founded in 2001, Xiamen Romandy Art Co., Ltd. is one of the leading oil painting galleries engaged in the production of handmade oil paintings in China. Our high quality products and excellence in service have helped us to enjoy a high reputation among our clients. Our overall goal is to continue to improve the quality of our products and service in the future. (Oil Painting for sale)
Tags: Tags: Newest Wall Painting Techniques, Newest Wall Painting Designs, Oil Painting Reproduction. |